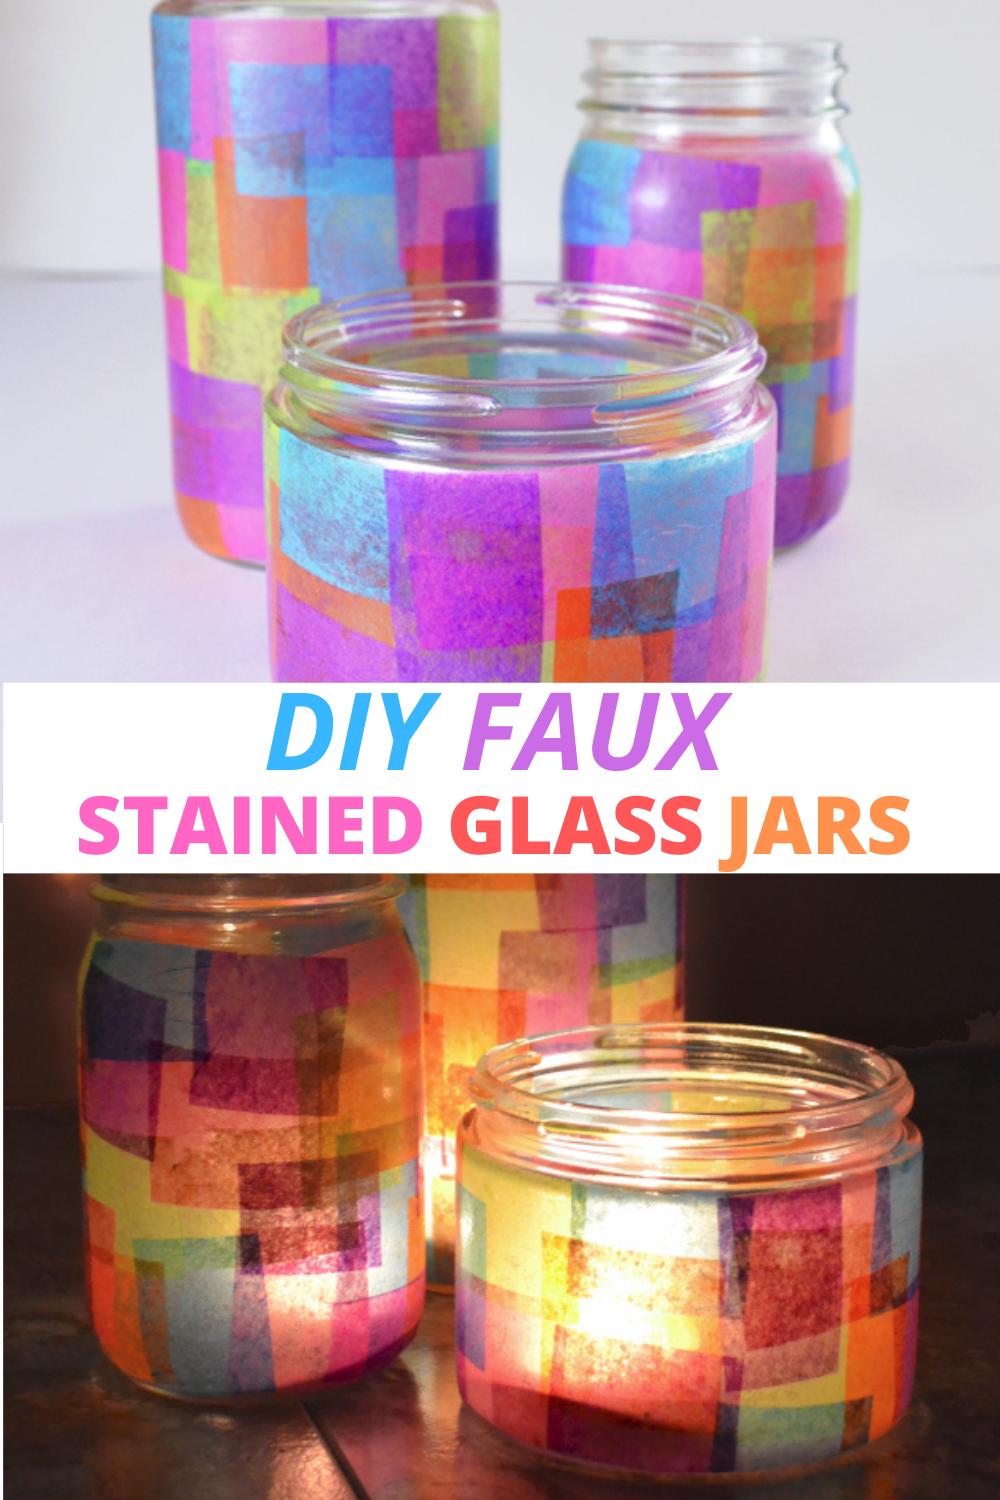
Learn how to make these DIY faux stained glass recycled jars made from tissue paper, Mod Podge, and candles!
I don’t know many kids who are really into stained glass, but I was when I was really little. My parents got these gorgeous stained glass windows that my dad hung from the ceiling in between the living room and the dining room. Who knows where they came from, but they were typical 80s in color scheme and design.

When I was little, just like today, I was also terrible about sleepwalking. The place I most often woke up was in the corner of the living room, behind my dad’s humongous brown recliner and just below one of these very pretty stained glass pieces. I’d wake up with colors from the glass shining down on my face. I remember lying there, long after I’d woken up, to watch the lights coming through change as the sun came up. And that was the best time to look at it when the sun was moving and the colors coming off danced with it.
I often worked to recreate the stained glass effect in my drawings and crafts. I remember one time Momma and I collected jam jars to turn into little miniature stained glass works of art. And some nights, when I had trouble sleeping (childhood insomnia is the pits), she would light a candle in one of the jars, and I’d watch the colors dance around my room with the flame.

Supplies to Make Faux Stained Glass Jars
- Used Jars
- Mod Podge
- Paintbrush
- Tissue paper
- Scissors
- Tea light candles or Battery-operated tea light candles


How to Make Stained Glass Recycled Jars
I hate the idea of wasting glass jars, which often come in handy when being crafty, so I tend to hoard them. Here is one of my stash bins of glass jars! Which, of course, isn’t interesting to the cats until I move it from there to here to take a picture of it.

I went through my stash and found three that were similar in shape but different sizes. I also made sure that they were smooth, as the raised texture ones wouldn’t be as easy to work with.

Tissue paper is often sold in coordinating multi-color packs. Take yours and cut it into little squares. They don’t all need to be the same size. In fact, the imperfection will really make these jars look nice.
Oh, and before you spend the time or the money, I’ll fill you in on a little secret. Do you know those nifty paper cutters that will punch stars or any number of nifty shapes out of a piece of paper for you? They don’t work with tissue paper.

When I was a kid, we used watered-down Elmer’s glue for our decoupage projects, but nowadays I am a Mod Podge lover. Take a small amount and brush it onto the glass. You want enough so that the tissue will adhere, but not too much. If the paper gets really sopping wet, it will tear so much more easily.

Continue gluing on your squares, being mindful of your color placement. Also, pay attention to the top edge of your paper. I wanted mine to be as straight as possible, or the whole thing would have rattled me. I didn’t bother trying to cover the lips of the jars where the threads for the lids are.

Do your best to maintain the same style when gluing your pieces onto different jars.
You can also tell that I occasionally used a square piece over already covered sections to have some nice overlap.

To finish your jars, layer a healthy coat of Mod Podge. Take care because any edges that didn’t get glued down in the first pass can easily tear when you brush over them.
Allow to fully dry.

Once completed, you now have pretty jars that you can place on your desktop with pens, or seal with outdoor Mod Podge (which is the closest formula to waterproof), you can even toss your toothbrushes in one.

But the magic happens when candles are lit inside a dark room.
The post DIY Faux Stained Glass Recycled Jars appeared first on Mom Spark.